Mobile testing on a remote device
Learn how to perform mobile testing on a remote device.
Remote devices allow testers to run their mobile applications on a wide range of real devices, emulators, and simulators without physically owning or connecting to each device. Remote devices for mobile testing are useful for cross-platform compatibility.
In Katalon Studio, you can configure and use remote devices for mobile app testing by setting up the desired capabilities for the remote device, such as the device type, platform version, and other specific configurations. This allows you to test your mobile applications on a variety of devices without the need to have them physically available.
To begin, you need to create a new test project. Afterwards, you need to set up your mobile testing environment for remote devices. See: Set up your mobile testing environment.
Set up your mobile testing environment
Creating a conducive testing environment is essential for conducting thorough and accurate mobile testing.
Setting up your mobile testing environment is the second step of the mobile testing workflow process.
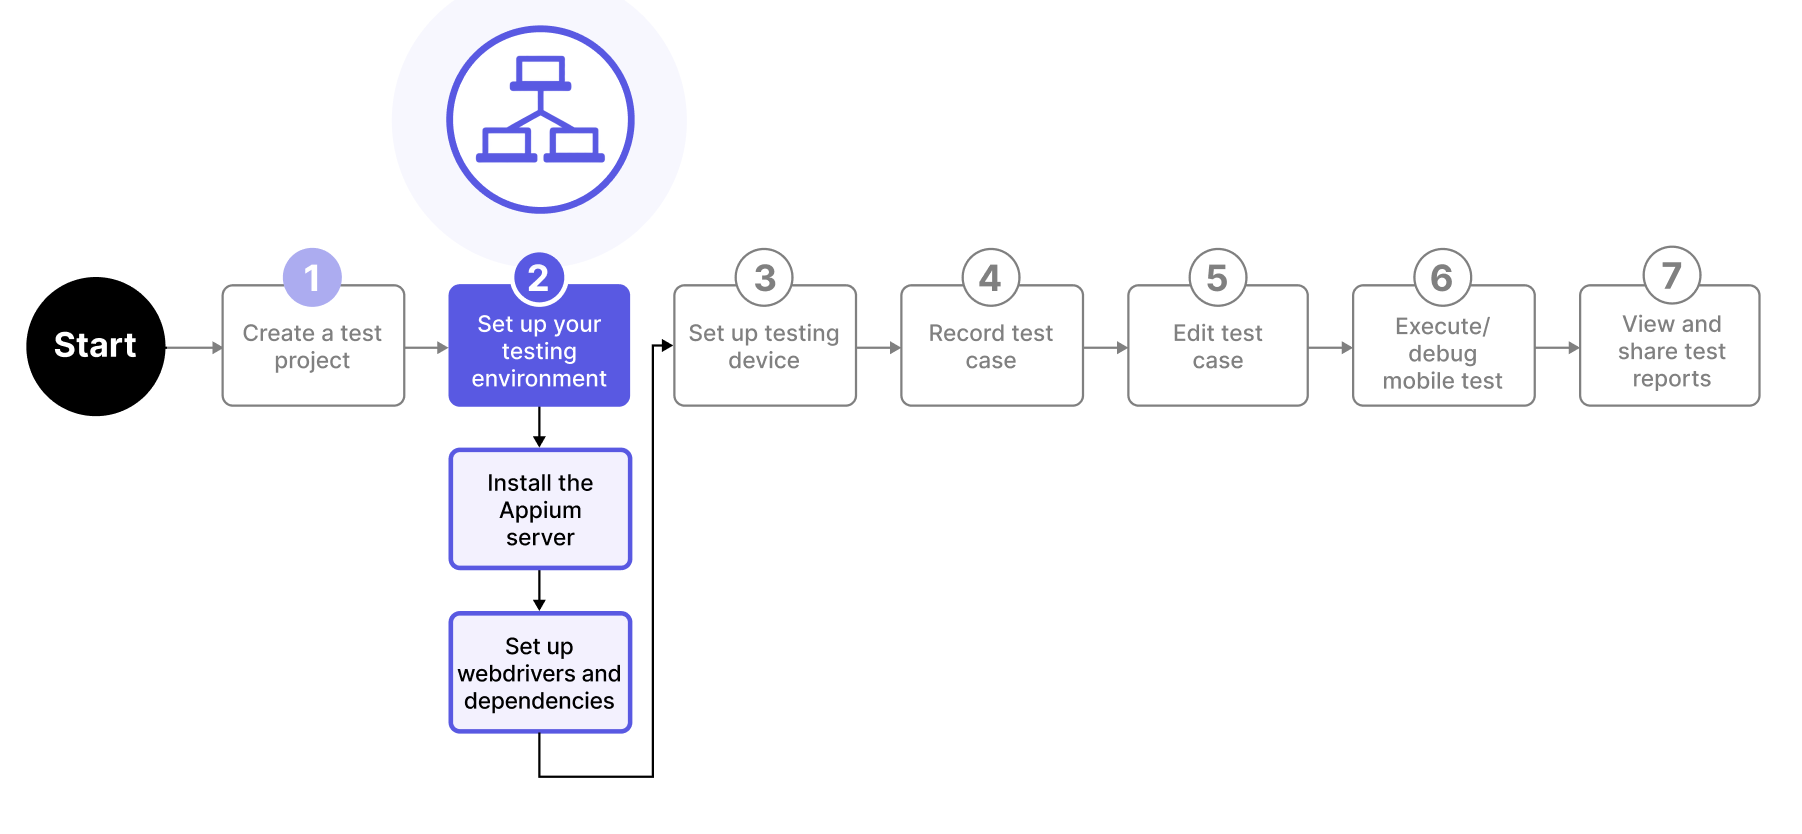 Refer to the following links below to setting up your testing environment:
Install the Appium server on your remote machine.
Set up your webdrivers and dependencies:
Set up your remote device
Learn how to set up your remote device.
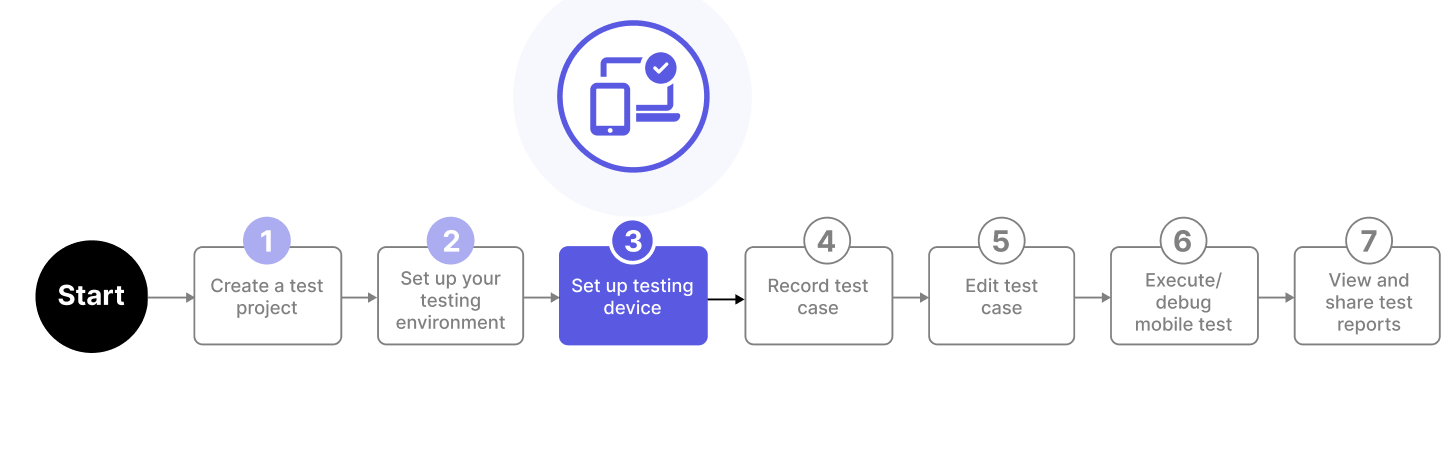
Setting up your remote device can be done via Project Settings. Here's how:
- Go to Spy Mobile or and click Edit.
A Project Settings dialog appears.
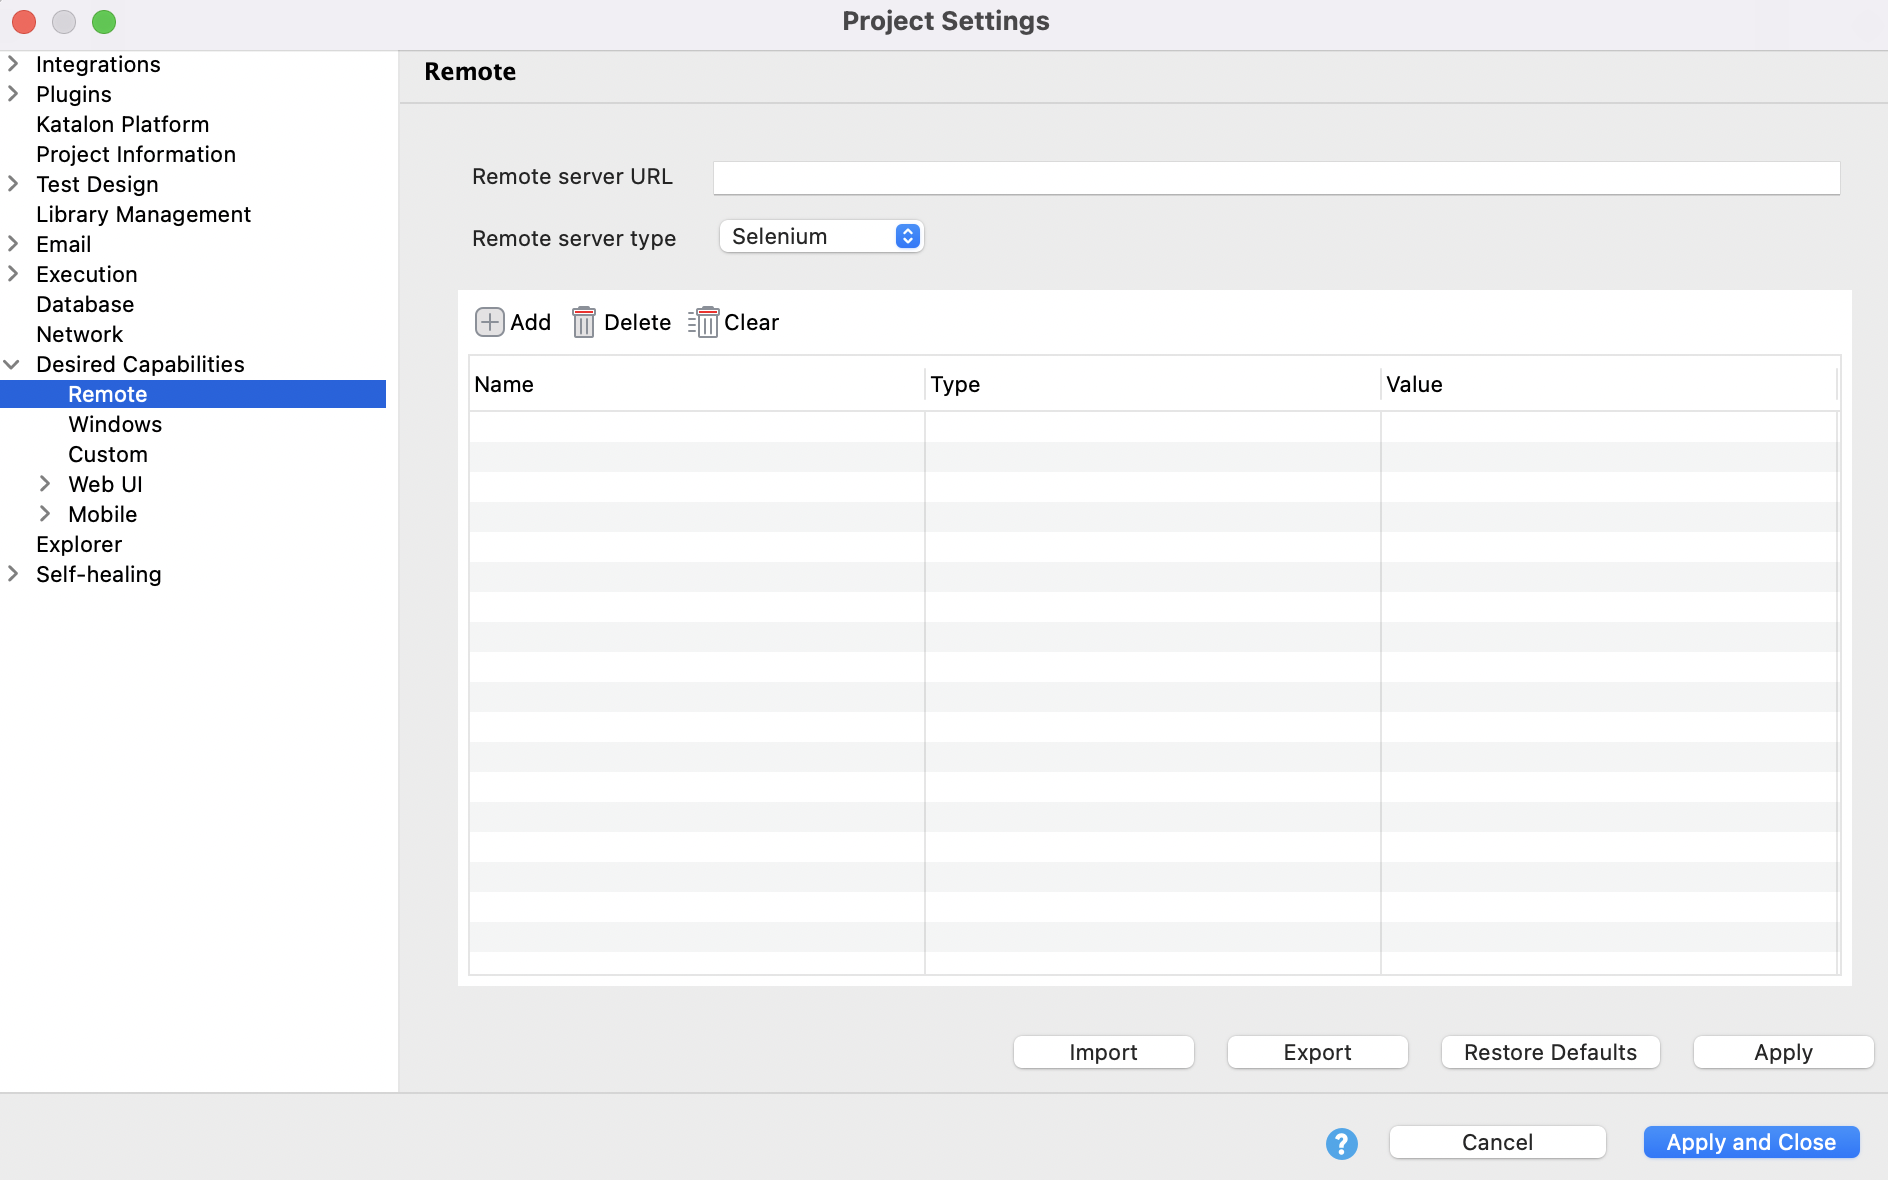
You can also go to .
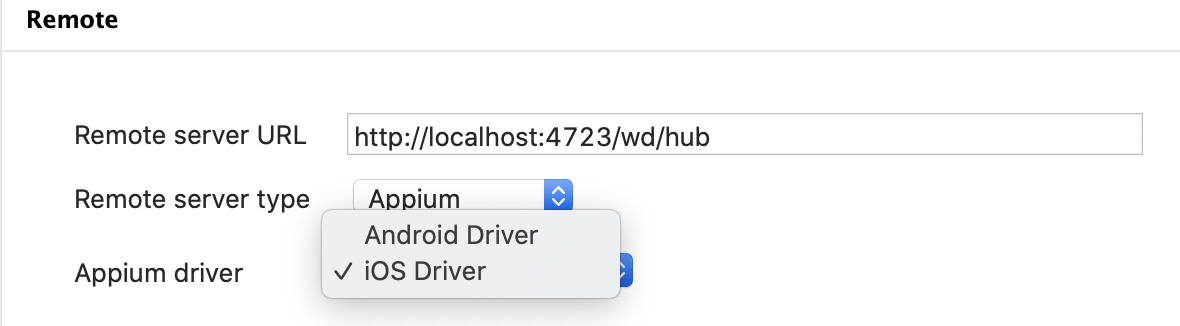
- Enter the Remote server URL in the input field and select the Remote server type.

-
In Appium driver, select Android Driver for Android devices; or iOS Driver for iOS devices.
-
Click Add to input the desired capabilities for your remote device.
- For Android: Provide the
platformName,platformVersionanddeviceNamecapabilities as shown in the example below: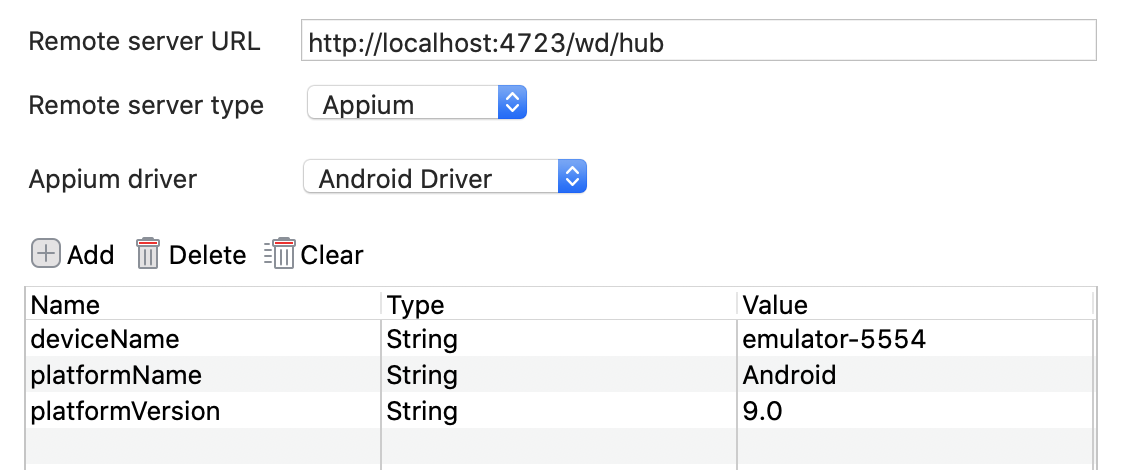 Note:
Note:In a remote machine, type adb devices in Command Prompt to retrieve deviceName (Id of an Android device/simulator).
- For iOS: Provide the
platformName,platformVersion,deviceName, andudidcapabilities.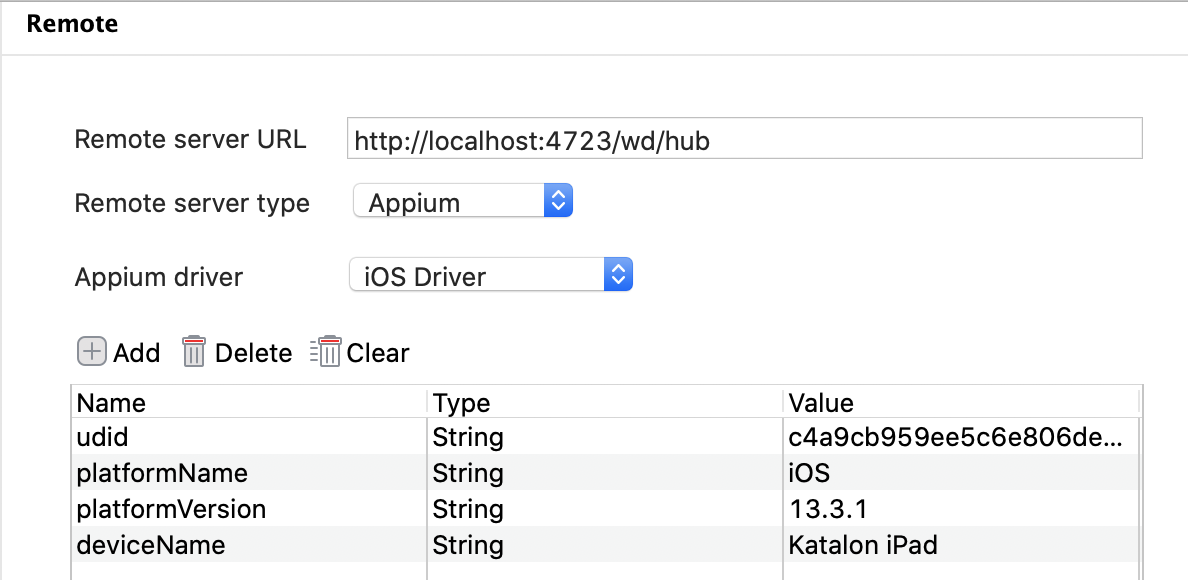 Note:
Note:In a remote machine, type
idevice_id -lin Terminal to retrieveudid(id of an iOS device/simulator).
-
Click Apply and Close.
You can now start recording a mobile test case. See: Record a mobile test case.
Record a mobile test case
This is a basic tutorial on how to begin mobile testing with Katalon Studio with completely new users in mind. Here you will learn how to create and execute your first test case.
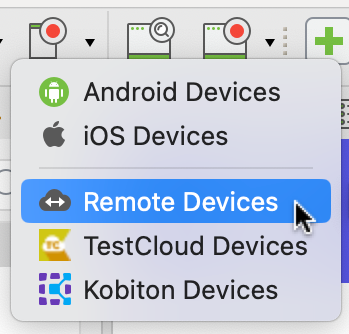
- On the main toolbar, click Record Mobile and then select Remote Devices.
- When selecting a specific object in the Device View section, Katalon Studio also selects the corresponding object in the All Objects section.
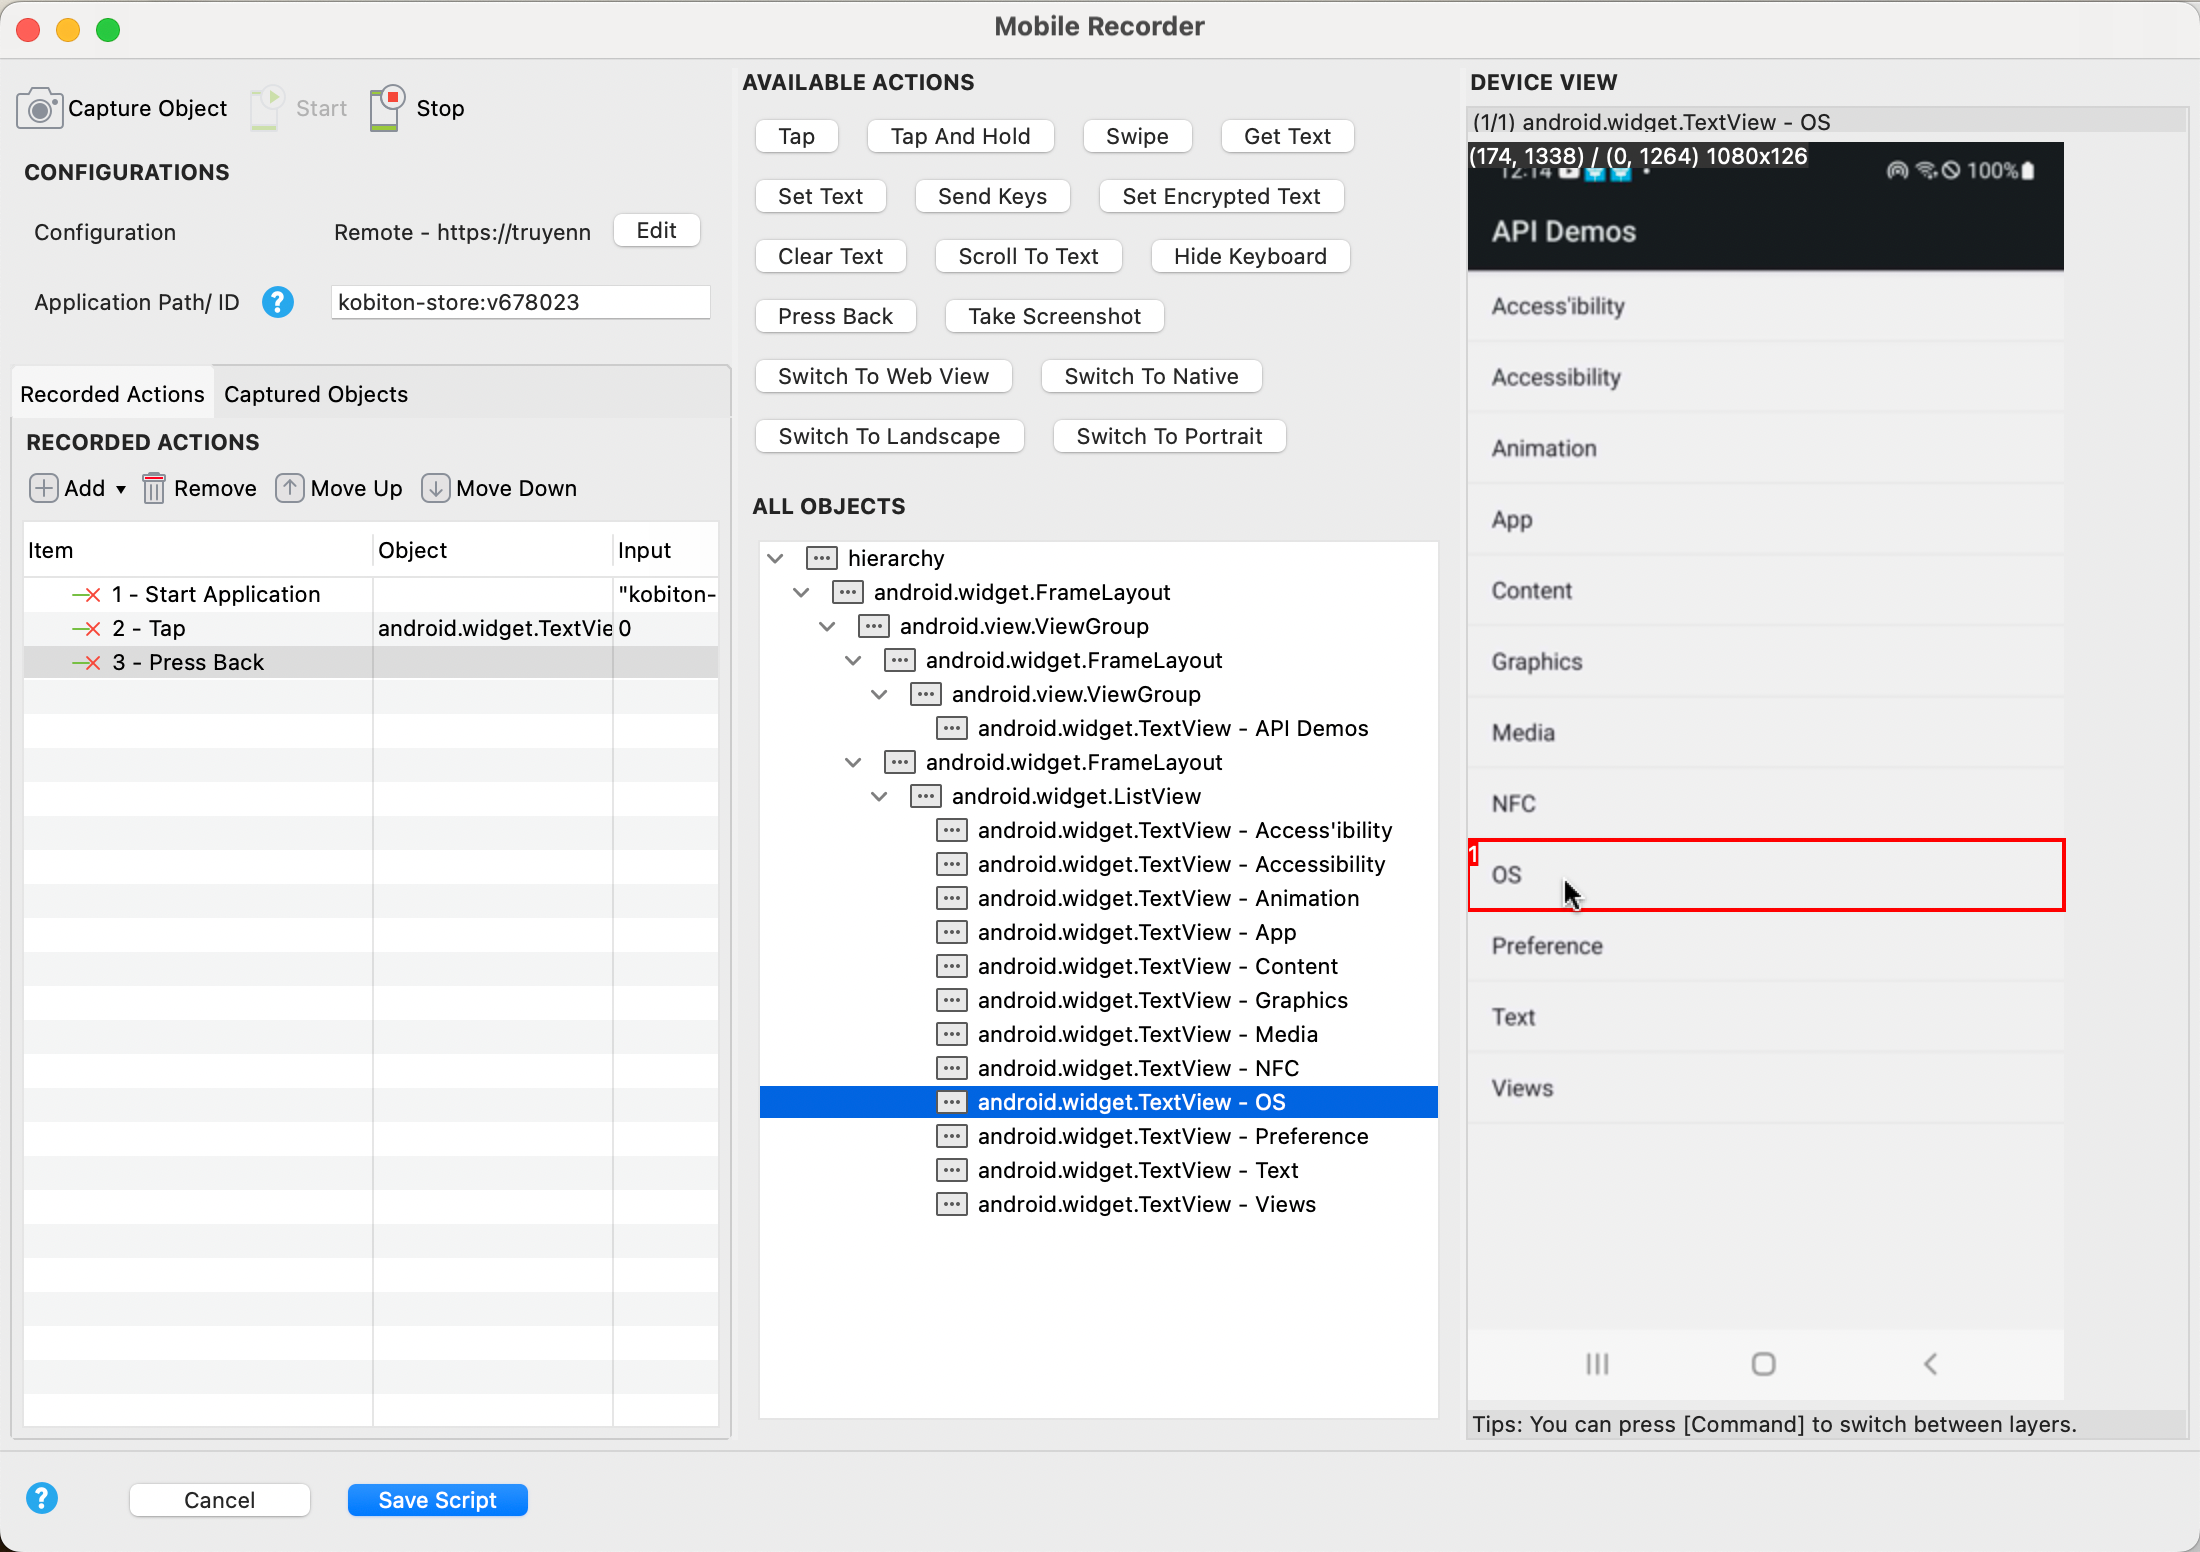
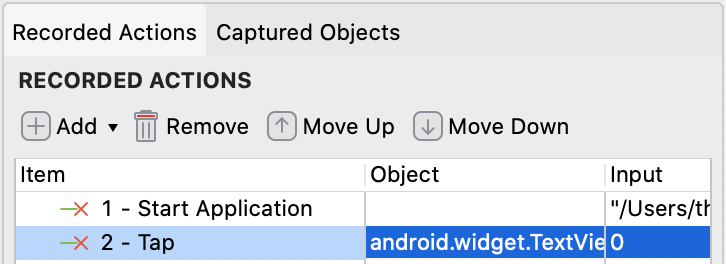
- You may check the Recorded Actions tab under the Configurations section to view the recorded actions.
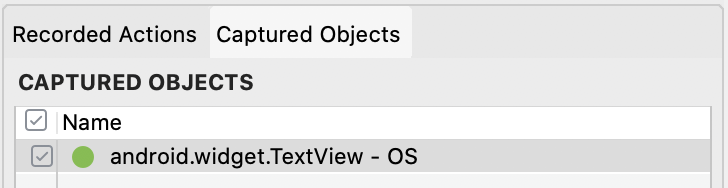
- You may check the Captured Objects tab under the Configurations section to view all test objects captured and their properties.
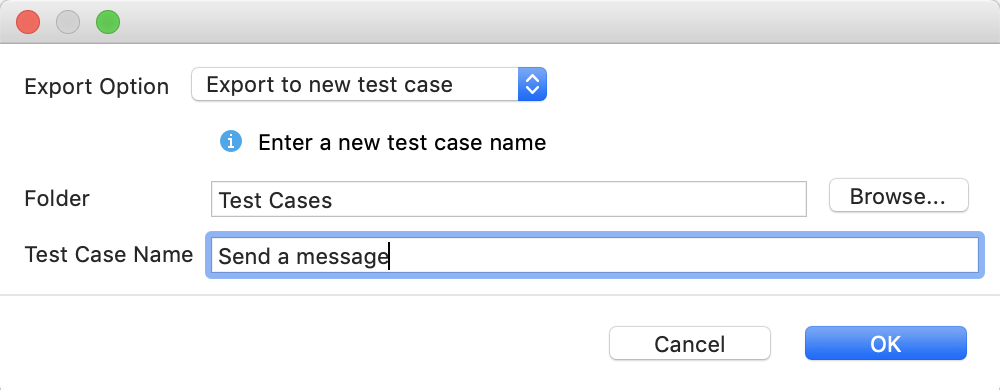
- Add the recorded test steps to a new test case, append to or overwrite an existing one.
Edit mobile test case
Editing a mobile test case can be done using a manual editor or via script view, and utilizing supported keywords.
Editing test cases in Katalon Studio can be done via manual view or script view as we have demonstrated previously. Simply access the Test Case Editor and follow the steps:
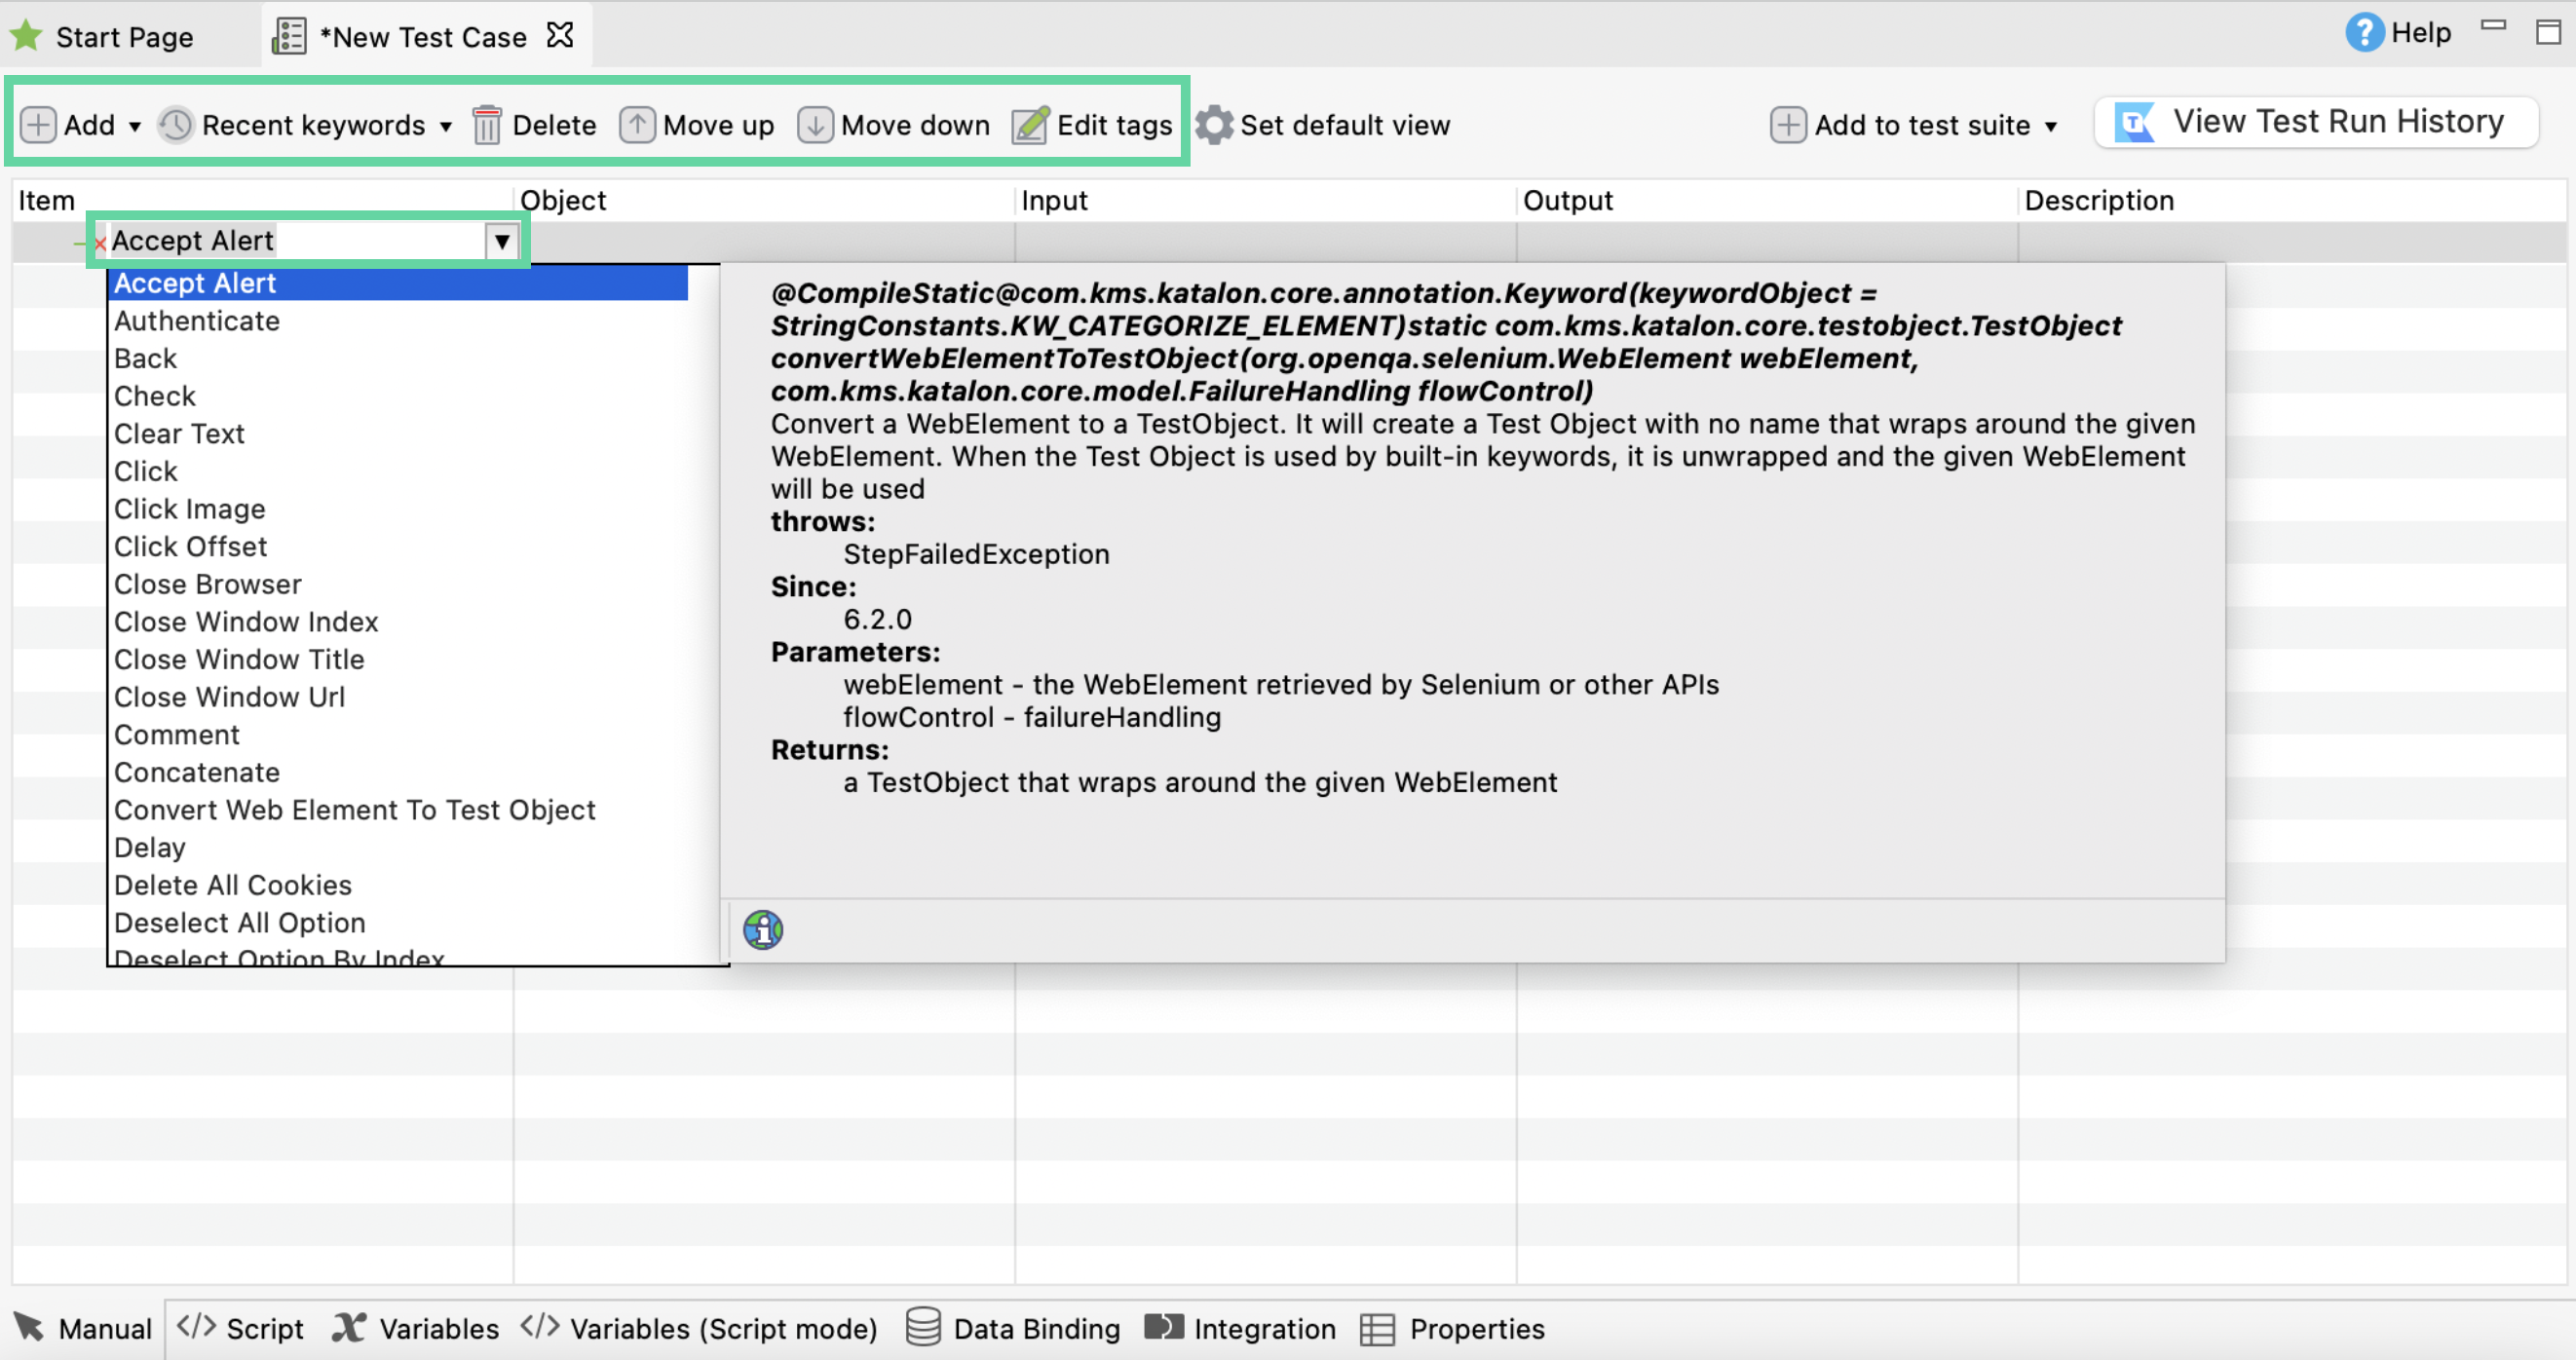
In the Manual tab, use the menu items or edit inline to add or edit your keywords.
In the Script tab, you can use the Content Assist function to edit the test case, of which has been converted into Groovy script. For mobile tests, we have mobile built-in keywords that you can access by typing the group keyword first (
Mobile.).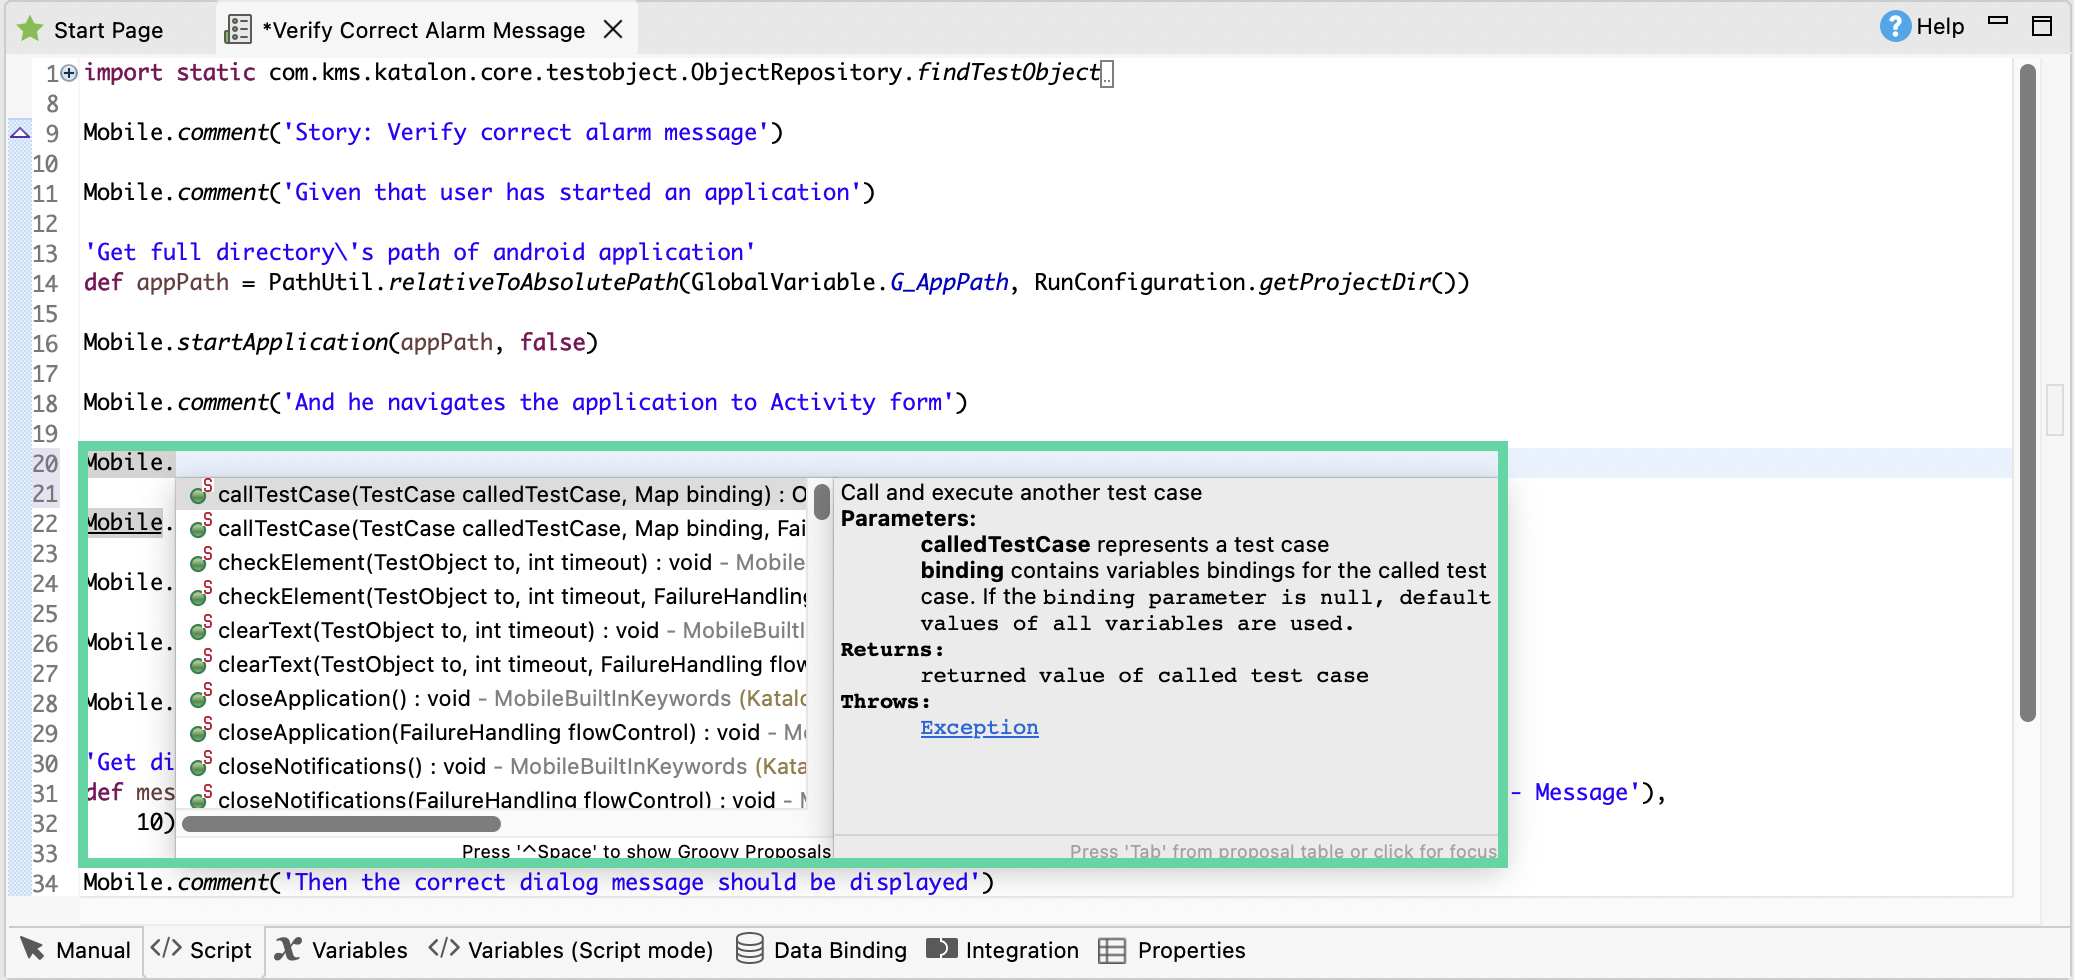
Execute and debug mobile test case
Learn how to execute and debug your newly recorded mobile test case.
See the following links on how to execute and debug your mobile test case:
Execute and debug mobile test case
Make sure that you have configured your preferred execution settings. See: Configure execution settings.
Debug a test case in Katalon Studio - There are at least four solutions how: